For Part 4 of the "Budget Laboratory" series, we're going to connect the ESXi 4.1 server we installed in Part 3, to the Virtual SAN we created using FreeNAS 8 in Part 2, using the vSphere client.
-
You will need:
- An iSCSI SAN.
- An ESXi 4.1 Server.
- A system running the vSphere client.*
*If you haven't already, open the IP you've configured for your ESXi server in a web browser to download and install the vSphere client.
Step 1: Open vSphere and login to your ESXi server.
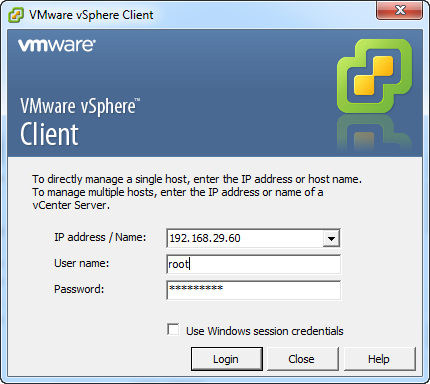
Enter the username and password for your ESXi server, then click "Login".
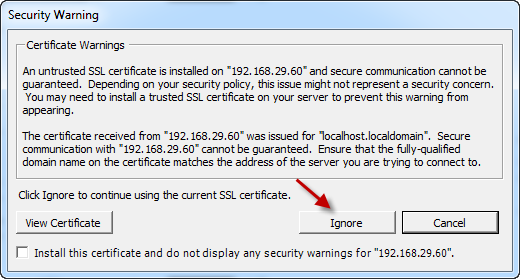
We aren't worried about SSL certificates for a lab environment, so we can just click "Ignore".
Note: For a production environment, you should obtain a valid SSL cert from a trusted Root Certificate Authority.
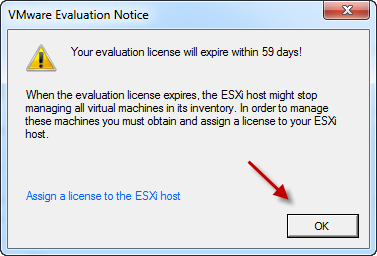
Click "OK".
Note: ESXi 4.1 is fully featured for 60 days. After that you need to enter a license key to continue using the free version. You should have received a license key via e-mail from VMWare when you registered to download ESXi 4.1. If you want to learn how to use the features that are only available in the paid version, you should use the evaluation mode for the duration of the trail, before switching over to the free version.
Step 2: Configure the Storage Adapter

Click the "Configuration" tab.
Click "Storage Adapters".
Select the iSCSI Software Adapter.
Click "Properties".
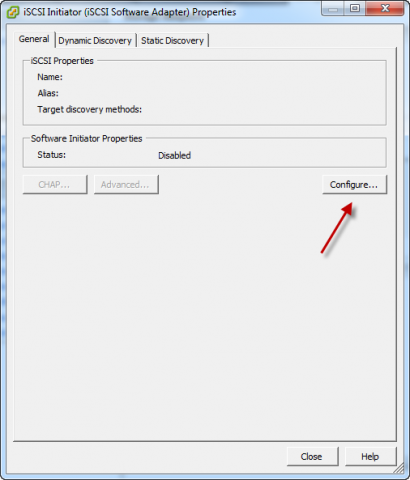
Click "Configure…".
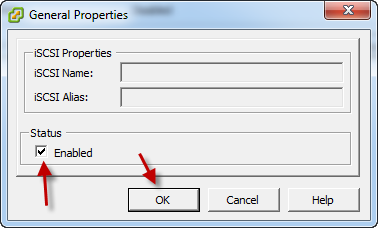
Check the "Enabled" box, then click "OK".
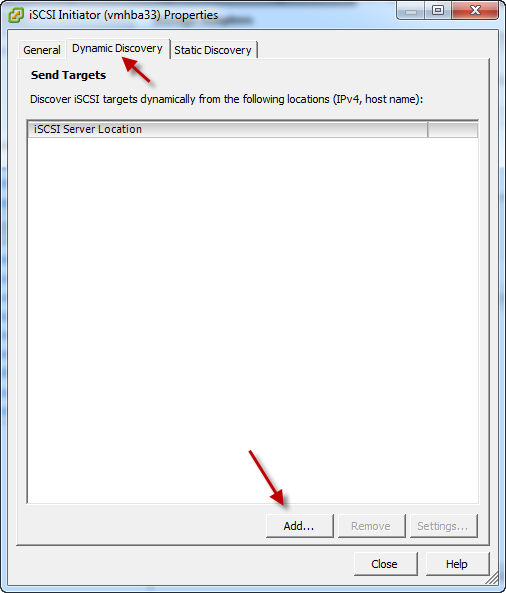
Click the "Dynamic Discovery" tab, then click "Add…"
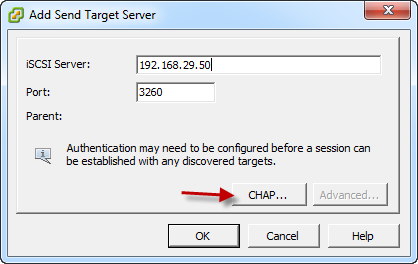
Type in the IP address of your iSCSI SAN, thenc lick "CHAP…"
Note: If you followed Part 2 of this series, the default port number should be the same as shown in the screen shot above. Otherwise enter the correct port number for your iSCSI SAN here as well.
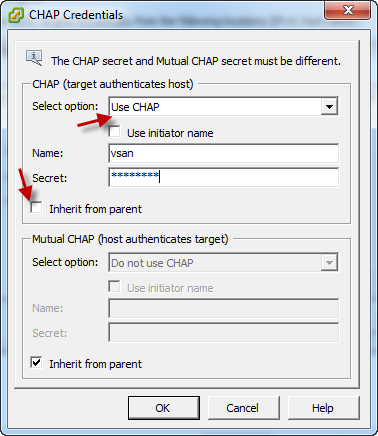
Uncheck the "Inherit from parent" box.
Select "Use CHAP" from the "Select option:" drop down box.
Enter the name and secret, then click "OK".
Note: If you followed Part 2 of this series, this should match what you set in the "Add iSCSI User" box. If your iSCSI SAN is configured to use a different authentication method, or does not use authentication, you should configure this accordingly.
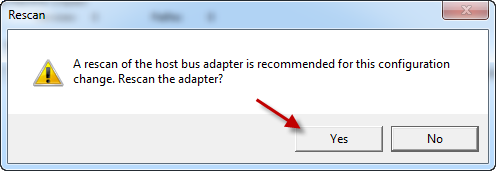
Click "Yes" to rescan the HBA.

You should now see any available disks from your SAN, as shown in the screenshot above.
Note: If you followed Part 2 of this series and do not see anything after rescanning the drives, make sure the iSCSI service is running on FreeNAS, and that you did not miss any steps. If it is running, you can try turning the service off and then back on again. Then go back to vSphere and click "Rescan All…". If you still do not see anything here, verify the network settings are correct on both your FreeNAS VM and your ESXi VM. Make sure they can communicate with each other over the network.
Step 3: Add Storage
Now that the connection has been established to our SAN, we can add the storage.
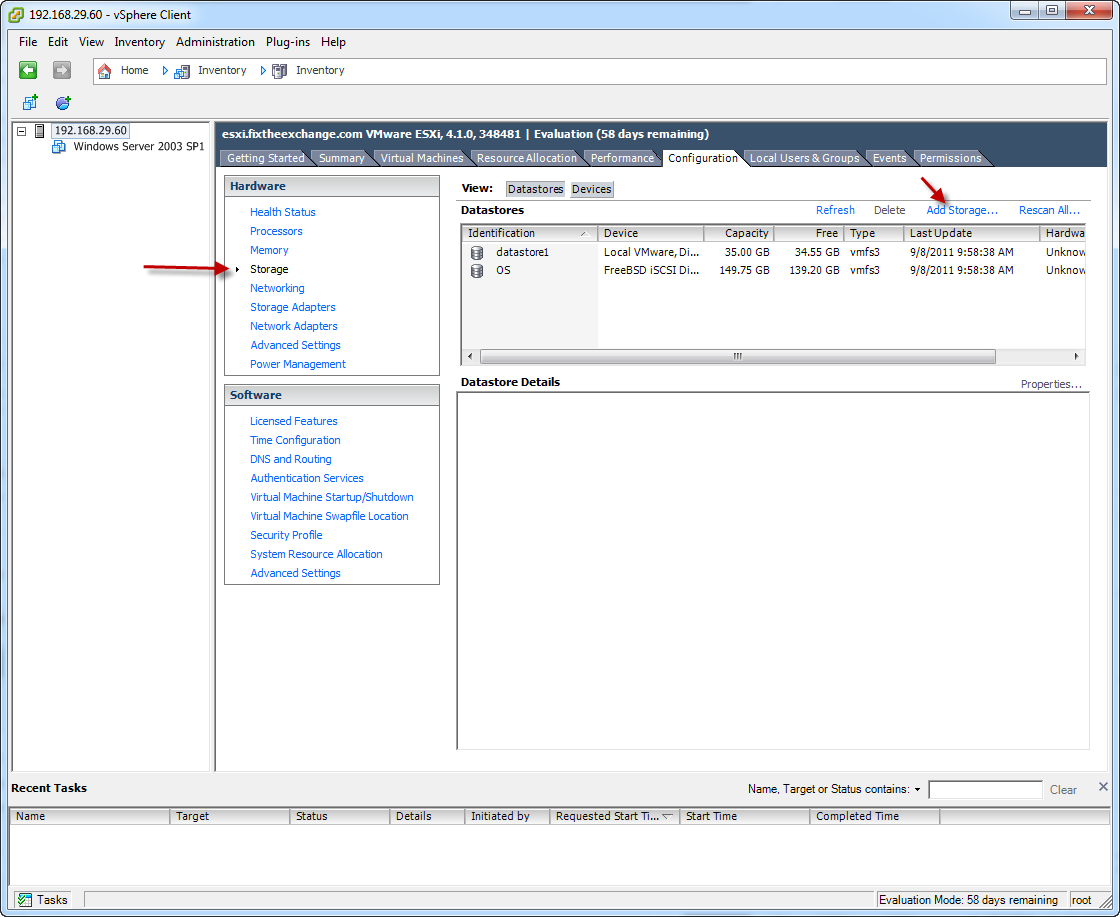
Click "Storage" then "Add Storage…"
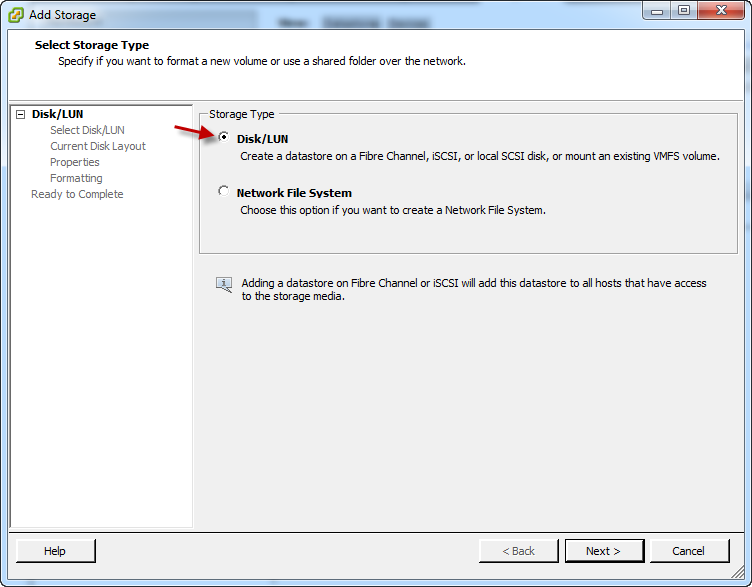
Select "Disk/LUN" then click "Next".
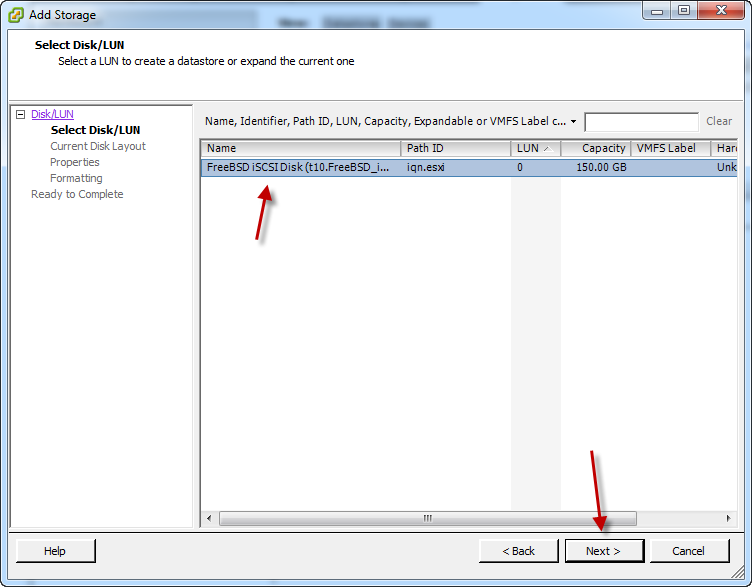
Select the disk you want to use, then click "Next".
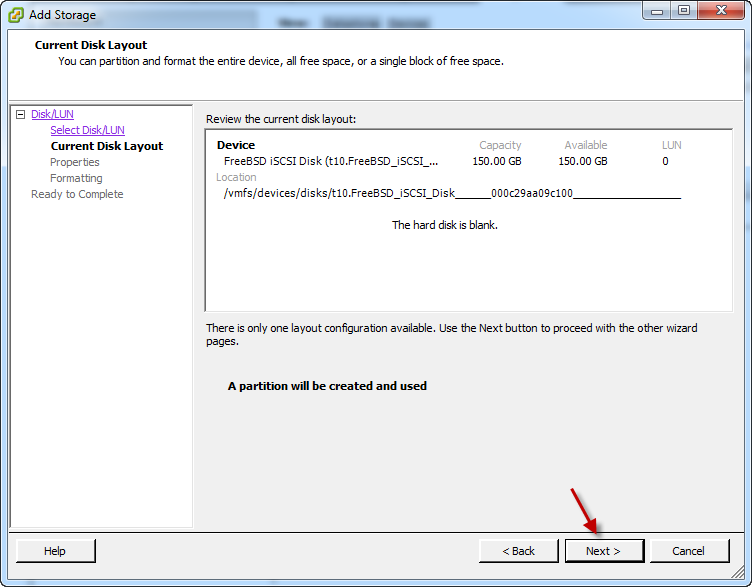
We're going to use this whole drive, that's why we created it, and it is the only option available to us, so just click "Next".
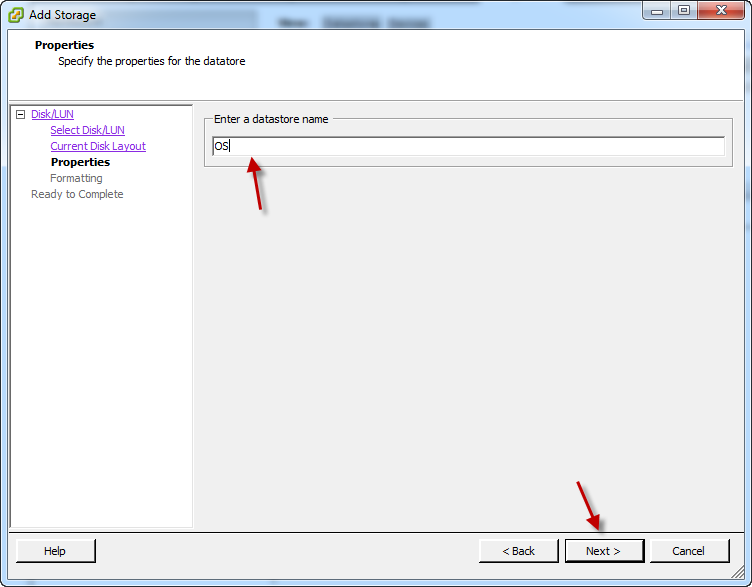
Here we can name our datastore. We'll be using this one just to store the virtual drives that will contain the OS for our VMs, so I called mine "OS". Give yours a name, and click "Next".
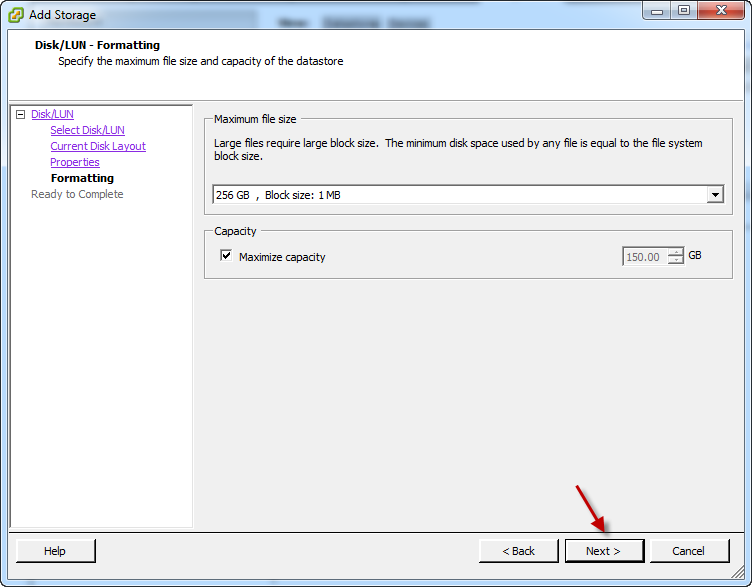
Here you can change the block size used when formatting the drive. Since we aren't using a very big drive for this lab, I just left the default. Click "Next".

Click "Finish".
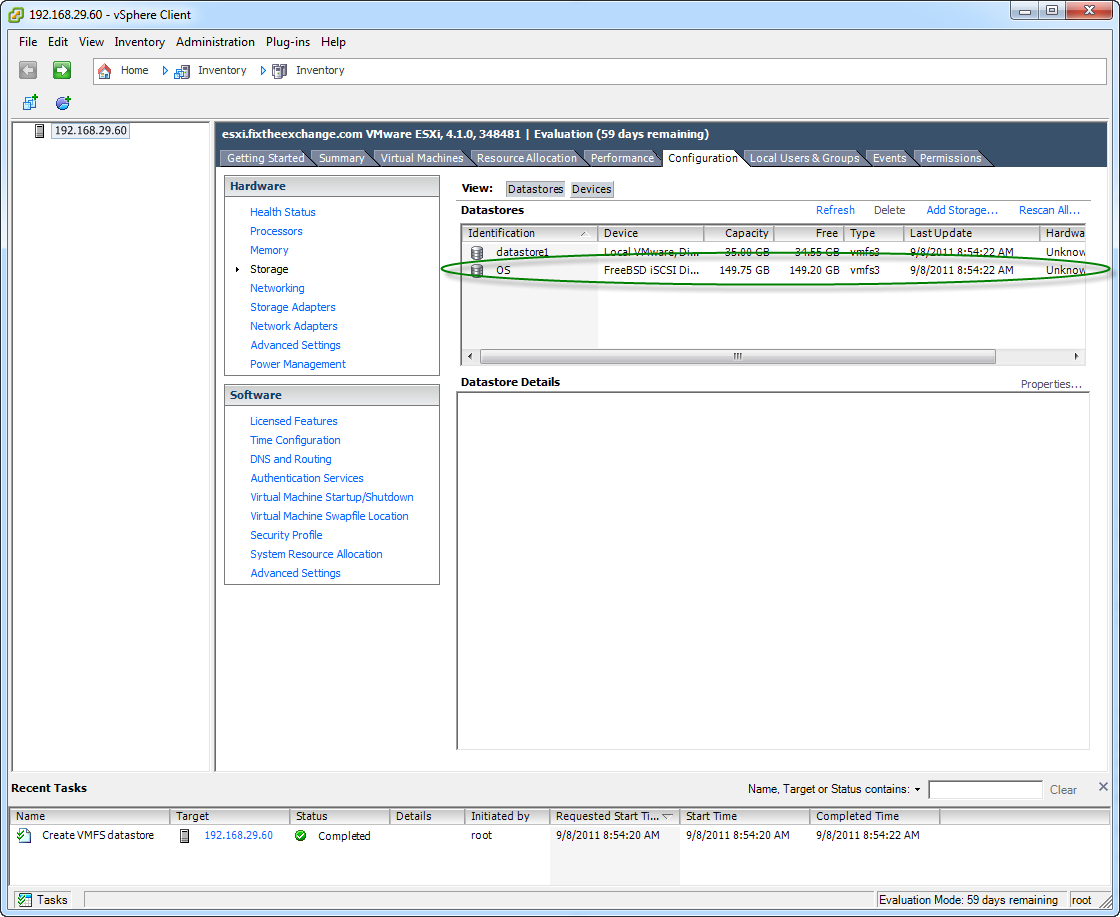
That's it! Our ESXi server is now using storage on our SAN.
In Part 5 of this series, I'll show you how to create OS templates that will allow you to quickly deploy VMs on your ESXi server.

Josh M. Bryant is currently a Director of Technical Product Management at Tanium where he builds products that help customers overcome the challenges of managing very large scale computing environments. Prior to joining Tanium, he was a Premier Field Engineer at Microsoft specializing in Microsoft Exchange Server, and then later a Cybersecurity Architect specializing in Compromise Recovery.